There’s nothing quite like the convenience of having ice on demand, right? But what happens when your trusty machine suddenly goes on strike? Before you panic and start buying bags of ice from the corner store, I’m here to tell you that the solution is often surprisingly simple. Learning How To Reset Ice Maker Machine models is one of the most powerful tricks in any homeowner’s toolkit. As the lead expert at Ice Maker Best, I’ve seen it all, and believe me, a simple reset can solve about 80% of common ice maker hiccups, from mysterious work stoppages to sluggish production. Let’s dive in and get your ice flowing again.
Why Do I Need to Reset My Ice Maker in the First Place?
Think of your ice maker’s control board as a mini-computer. Just like your laptop or phone, it can sometimes get its wires crossed. A power surge, a temporary jam in the ice ejection cycle, or even just an internal glitch can cause it to freeze up—pun intended.
A reset acts like a reboot. It forces the machine to power down, clear its short-term memory of any errors, and start its cycle from scratch. It’s a non-invasive first step that can save you a lot of time, money, and frustration.
Common Signs Your Ice Maker Needs a Reset
- It’s completely stopped making ice: The most obvious sign. The water line is fine, the freezer is cold, but there’s no action.
- The control arm is stuck: For in-freezer models, the wire arm might be stuck in the “off” (up) position.
- Blinking lights: Many modern units use indicator lights to signal an error, and a reset can often clear it.
- It only makes a small batch and then stops: This could indicate the machine didn’t properly complete its last cycle.
Your Step-by-Step Guide on How to Reset Ice Maker Machine
The exact method can vary slightly between a portable countertop unit and a built-in refrigerator model, but the core principles are the same. We’ll start with the simplest method and work our way up. Always unplug your appliance before performing any hands-on maintenance.
Method 1: The Classic Power Cycle
This is the “turn it off and on again” of the appliance world, and it works wonders. It’s the first thing you should always try.
- Unplug It: For a countertop ice maker, simply unplug it from the wall. For a refrigerator ice maker, you’ll need to pull the entire fridge out and unplug it from the wall.
- Wait: Don’t just plug it back in immediately. Leave the unit unplugged for at least 5-10 minutes. This gives the internal capacitors time to fully discharge, ensuring the control board’s memory is completely wiped.
- Plug It Back In: Reconnect the power source.
- Listen and Wait: You should hear the ice maker whir back to life. It may take a few moments to fill with water and begin its cooling cycle. Be patient; it can take anywhere from 90 minutes to a few hours before you see the first batch of ice drop.
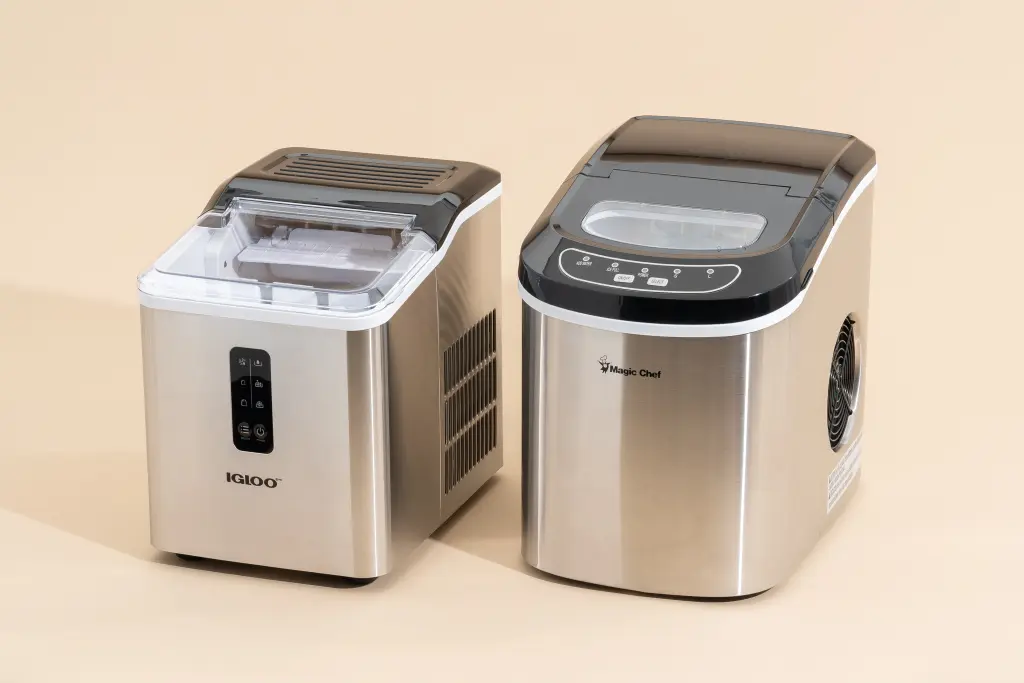
Method 2: The Dedicated Reset Button
Many modern ice makers, especially countertop and undercounter models, come with a dedicated reset button to make your life easier.
- Locate the Button: It’s often a small, sometimes recessed, button. Check the main control panel. It might be labeled “Reset,” or you might see a combination like “Power” and “Select” that you need to press and hold simultaneously.
- Consult Your Manual: Your user manual is your best friend here. It will show you exactly where the button is and the correct procedure (e.g., “press and hold for 3 seconds”).
- Press and Hold: Follow the manufacturer’s instructions. You’ll often hear a beep or see the lights flash to confirm the reset was successful.
As our go-to appliance technician, John Carter, always says: “People often overlook the reset button because it’s small or hidden. I’ve fixed countless ‘broken’ ice makers just by showing the owner a button they never knew existed. Always check for it before you call for service.”
Method 3: The Manual Reset for In-Freezer Models
This applies to the traditional ice makers found inside your freezer compartment. These often don’t have a button and rely on a physical reset process.
- Turn it Off: Locate the wire control arm. Lift it up into the locked “off” position. You should hear a click.
- Power Down: Unplug the refrigerator and wait 10 minutes, just like in the power cycle method.
- Power Up: Plug the refrigerator back in.
- Turn it On: Lower the wire control arm back down to the “on” position.
- Initiate a Cycle: On some models (like many from Whirlpool, KitchenAid, and Kenmore), you can manually kickstart the harvest cycle. Look for small holes on the side of the motor module. You can sometimes gently turn a small gear or push a paperclip into a specific hole to force the cycle to begin. Caution: Do this gently and only if you’re comfortable.
|
Our Picks for the Best Ice Maker in 2026
As an Amazon Associate, we earn from qualifying purchases.
|
||
| Num | Product | Action |
|---|---|---|
| 1 | Frigidaire 26 Lbs per Day Portable Compact Maker, Ice Making Machine, Black Stainless, Medium |

|
| 2 | Ice Maker Countertop, 9 Cubes Ready in 6 Mins, 26 lbs per Day, Ice Machine with 2 Ice Sizes and Self-Cleaning, Portable Ice Maker with Handle for Home, Kitchen, Camping, RV, Office, Black |
|
| 3 | Nugget Ice Maker Countertop, Silonn Chewable Pellet Ice Machine with Self-Cleanin Function, 33lbs/24H Portable Ice Makers for Home Kitchen Officce, Black |
|
| 4 | Silonn Nugget Ice Maker Countertop, Pebble Ice Maker with Soft Chewable Ice, One-Click Operation Ice Machine with Self-Cleaning, 33lbs/24H for Home,Kitchen,Office |
|
| 5 | Silonn Countertop Ice Maker, 9 Ice Cubes in 6 Mins, 26 Lbs in 24 Hrs, Compact Ice Machine with Ice Basket & Scoop, 2 Ice Sizes, Self-Cleaning Ice Maker for Home/Party/Office/Bar/Dorm, Black |
|
| 6 | EUHOMY Nugget Ice Makers Countertop, Pebble Ice Maker Machine with 35lbs/24H Soft Ice, Self-Cleaning Sonic Ice Maker with Ice Scoop&Basket, Pellet Ice Maker for Home/Kitchen/Office(Stainless Steels) |
|
| 7 | Silonn Ice Makers Countertop, 9 Cubes Ready in 6 Mins, 26lbs in 24Hrs, Self-Cleaning Ice Machine with Ice Scoop and Basket, 2 Sizes of Bullet Ice for Home Kitchen Office Bar Party, Sliver |
|
| 8 | EUHOMY Nugget Ice Maker Countertop with Handle, Ready in 6 Mins, 34lbs Per Day, Removable Top Cover, Auto-Cleaning, Portable Sonic Ice Maker with Basket and Scoop, for Home/Party/RV/Camping (Black) |
|
| 9 | FRIGIDAIRE EFIC128AMZBLK Compact Countertop Ice Maker, 26 lb per Day, Black |
|
| 10 | FRIGIDAIRE EFIC189-Silver Compact Ice Maker, 26 lb per Day, Silver |
|
What If Resetting Doesn’t Fix the Problem?
If you’ve tried to reset ice maker machine and you’re still not getting any ice, it’s time to play detective. The reset fixed the software; now let’s check the hardware.
- Check the Water Supply: Is the water line connected and the valve open? A kinked or frozen line is a common culprit.
- Verify Freezer Temperature: Your freezer needs to be cold enough, typically between 0°F and 5°F (-18°C). If it’s too warm, the ice maker’s thermostat won’t allow it to start a cycle.
- Inspect the Fill Tube: The tube that brings water into the ice mold can sometimes freeze over. If you see an ice blockage, you can carefully thaw it with a hairdryer on a low setting.
- Clear Ice Jams: Sometimes a piece of ice gets lodged in the ejector arm, preventing it from completing the cycle. Gently remove any obstructions.
Proactive Care: Keeping Your Ice Maker Happy
The best way to avoid problems is through regular maintenance. A clean machine is an efficient machine.
- Monthly Cleaning: For countertop models, empty the unit, and wipe it down with a solution of equal parts water and white vinegar. Rinse thoroughly.
- Filter Changes: For refrigerator models, be sure to change the water filter as recommended by the manufacturer (usually every 6 months). A clogged filter can restrict water flow and lead to small or hollow ice cubes.
- Deep Clean: Once or twice a year, perform a descaling cycle using a dedicated ice machine cleaning solution to remove mineral buildup.
Is It Time for a New Ice Maker?
Sometimes, an old machine has simply reached the end of its life. If you’re constantly troubleshooting, it might be more cost-effective to upgrade. When you’re shopping, think about what you really need.
Key Types of Ice Makers
- Countertop/Portable: Perfect for renters, RVs, or for extra ice during parties. They are fast and don’t require a water line.
- Undercounter: A high-end option that installs under your counter like a dishwasher. They produce large quantities of high-quality ice.
- In-Refrigerator: The most common type, built directly into your freezer. Convenient but typically have a smaller production capacity.
What Kind of Ice Do You Crave?
Not all ice is created equal! The type of ice can completely change your drink experience.
| Ice Type | Best For | Description |
|---|---|---|
| Bullet Ice | Everyday drinks, bagging | Cylinder-shaped with a hollow center. Fast to make. |
| Nugget Ice | Sodas, cocktails, iced coffee | Also known as “Sonic ice.” Soft, chewable, and absorbs the flavor of your drink. |
| Clear Cube Ice | Whiskey, high-end cocktails | Solid, dense cubes that melt very slowly, preventing drink dilution. |
| Crescent Ice | General use, dispensers | The classic half-moon shape from most refrigerator ice makers. |
Frequently Asked Questions
Q: How long does it take for an ice maker to start working after a reset?
A: Be patient. After a successful reset, it needs to cool down and complete a full cycle. This typically takes between 90 minutes and 3 hours, depending on the model and the ambient temperature.
Q: Why is my ice maker making a loud buzzing or grinding noise?
A: A buzzing noise usually means the machine is trying to get water but the line is shut off or blocked. A grinding noise could indicate a problem with the ejector motor or a significant ice jam.
Q: How often should I clean my portable ice maker?
A: For best results and taste, a light cleaning (wiping it out) should be done weekly if you use it daily. A full descaling and sanitizing clean should be performed at least every 3-6 months, or more often if you have hard water.
Q: My ice maker has a blinking red light. What does that mean?
A: A blinking red light is almost always an error code. It often means the water reservoir is empty, the ice basket is full, or there’s an internal sensor error. A reset can often clear sensor errors.
Q: Can I use the same reset process for a Samsung, LG, or GE ice maker?
A: The general principles, especially the power cycle method, apply to nearly all brands. However, the location of specific reset buttons or the procedure for manually starting a cycle can differ. It’s always a good idea to search for your specific model number online if the general steps don’t work.
Your Ice Cold Conclusion
Mastering how to reset ice maker machine is a simple yet effective skill that empowers you to solve one of the most common appliance frustrations right at home. It’s often the first and only step you’ll need to get things running smoothly again. By understanding the causes, following the simple reset steps, and performing a bit of routine maintenance, you can ensure a steady supply of fresh ice for every occasion. So next time your ice maker takes an unexpected break, you’ll know exactly what to do.