Let’s be real for a moment. That glorious, clinking sound of fresh ice dropping into the bin is one of life’s simple pleasures. But when your ice starts tasting a little… funky, or the cubes look cloudy and small, that pleasure turns into a problem. The culprit is almost always a dirty machine. Knowing How To Clean Ice Maker Properly isn’t just about good hygiene; it’s about protecting your investment and ensuring every drink is as crisp and refreshing as it should be. As the lead expert at Ice Maker Best, I’ve seen firsthand how a little regular maintenance can be a total game-changer, saving you from costly repairs and, frankly, bad-tasting cocktails.
Why Bother Cleaning Your Ice Maker?
You might be thinking, “It’s just frozen water, how dirty can it get?” You’d be surprised. An uncleaned ice maker can become a breeding ground for all sorts of unpleasant things that you definitely don’t want in your glass.
- Mold and Mildew: The dark, damp environment inside an ice maker is a perfect paradise for mold and mildew spores to thrive. This not only tastes terrible but can also pose health risks.
- Mineral Buildup (Scale): If you live in an area with hard water, minerals like calcium and magnesium will slowly build up on the internal components. This scale can clog water lines, reduce efficiency, and eventually cause the machine to break down.
- Bacteria and Slime: Over time, a biofilm or slime can develop from airborne bacteria and yeast. It’s just as gross as it sounds.
- Bad Tastes and Odors: The ice in your machine can absorb odors from the surrounding environment or from the gunk building up inside. If your ice tastes like last night’s fish dinner, it’s a clear sign you need to clean.
A clean machine produces clearer, better-tasting ice, runs more efficiently (saving you money on your energy bill), and will last significantly longer.
Know Your Enemy: Cleaning Different Ice Maker Types
Before you start scrubbing, it’s crucial to know what kind of machine you’re dealing with, as the process can vary slightly.
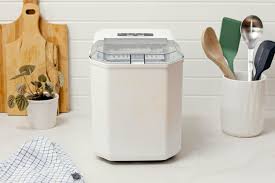
Countertop (Portable) Ice Makers
These are the popular, compact units you see in many homes. They’re wonderfully convenient but need frequent cleaning because their water reservoirs are often left sitting with water.
Undercounter and Built-in Ice Makers
These are installed under a counter, much like a dishwasher. They are typically connected directly to a water line, which means you’ll be dealing with more mineral scale buildup over time.
Refrigerator Ice Makers
The classic in-freezer ice maker is often the most neglected. Cleaning these involves not just the ice bin but also the water line and the mold assembly itself, which can be a bit trickier to access.
The Ultimate Guide: How to Clean Ice Maker Properly
Alright, let’s roll up our sleeves. This step-by-step guide is a universal process that works for most types of ice makers. Always, always, always check your manufacturer’s manual first, as they may have specific instructions or recommend particular cleaning solutions.
Step 1: Gather Your Supplies
You don’t need a lot of fancy equipment. Most of what you need is probably already in your kitchen.
- A soft cloth or sponge (non-abrasive)
- A small brush (an old toothbrush works great)
- White vinegar or a dedicated, nickel-safe ice maker cleaning solution
- Mild dish soap and warm water
- A bucket or bowl to catch water
Expert Tip from John Carter, Certified Appliance Technician: “People often grab the harshest chemical cleaner they can find. Don’t do it. A simple solution of vinegar and water is effective for descaling and is food-safe. For sanitizing, a heavily diluted bleach solution can be used, but you must rinse it extremely thoroughly.”
Step 2: Prep the Machine
Safety first!
- Unplug the ice maker from the power source. No exceptions.
- Empty everything out. Remove all ice from the bin and discard it. If it’s a portable unit, pour out any water left in the reservoir.
- Remove all removable parts. This usually includes the ice bin, scoop, and any baffles or water deflectors.
|
Our Picks for the Best Ice Maker in 2026
As an Amazon Associate, we earn from qualifying purchases.
|
||
| Num | Product | Action |
|---|---|---|
| 1 | Silonn Countertop Ice Maker, 9 Ice Cubes in 6 Mins, 26 Lbs in 24 Hrs, Compact Ice Machine with Ice Basket & Scoop, 2 Ice Sizes, Self-Cleaning Ice Maker for Home/Party/Office/Bar/Dorm, Black |

|
| 2 | Frigidaire 26 Lbs per Day Portable Compact Maker, Ice Making Machine, Black Stainless, Medium |
|
| 3 | EUHOMY Nugget Ice Makers Countertop, Pebble Ice Maker Machine with 35lbs/24H Soft Ice, Self-Cleaning Sonic Ice Maker with Ice Scoop&Basket, Pellet Ice Maker for Home/Kitchen/Office(Stainless Steels) |
|
| 4 | FRIGIDAIRE EFIC128AMZBLK Compact Countertop Ice Maker, 26 lb per Day, Black |
|
| 5 | EUHOMY Nugget Ice Maker Countertop with Handle, Ready in 6 Mins, 34lbs Per Day, Removable Top Cover, Auto-Cleaning, Portable Sonic Ice Maker with Basket and Scoop, for Home/Party/RV/Camping (Black) |
|
| 6 | Ice Maker Countertop, 9 Cubes Ready in 6 Mins, 26 lbs per Day, Ice Machine with 2 Ice Sizes and Self-Cleaning, Portable Ice Maker with Handle for Home, Kitchen, Camping, RV, Office, Black |
|
| 7 | Nugget Ice Maker Countertop, Silonn Chewable Pellet Ice Machine with Self-Cleanin Function, 33lbs/24H Portable Ice Makers for Home Kitchen Officce, Black |
|
| 8 | Silonn Nugget Ice Maker Countertop, Pebble Ice Maker with Soft Chewable Ice, One-Click Operation Ice Machine with Self-Cleaning, 33lbs/24H for Home,Kitchen,Office |
|
| 9 | FRIGIDAIRE EFIC189-Silver Compact Ice Maker, 26 lb per Day, Silver |
|
| 10 | Silonn Ice Makers Countertop, 9 Cubes Ready in 6 Mins, 26lbs in 24Hrs, Self-Cleaning Ice Machine with Ice Scoop and Basket, 2 Sizes of Bullet Ice for Home Kitchen Office Bar Party, Sliver |
|
Step 3: The Deep Clean (Inside the Machine)
This is where the magic happens.
- Wash Removable Parts: Take all the parts you removed and wash them in your sink with warm, soapy water. Use your soft brush to get into any corners. Rinse them thoroughly and set them aside to air dry.
- Create Your Cleaning Solution: Mix a solution of equal parts white vinegar and water. If you’re using a commercial ice machine cleaner, follow the instructions on the bottle.
- Wipe Down the Interior: Dip your soft cloth in the cleaning solution and thoroughly wipe down every surface inside the ice maker. Pay special attention to the ice-making mechanism, the water reservoir, and any hard-to-reach corners. Use your toothbrush for stubborn spots of buildup.
- Run a Cleaning Cycle:
- For Portable/Countertop Units: Pour the vinegar/water solution into the water reservoir up to the fill line. Plug the machine back in and run it through a full ice-making cycle (or use the dedicated “Clean” function if it has one). Discard the ice it makes—this ice is for cleaning, not for consuming! Run 2-3 cycles with the cleaning solution.
- For Undercounter/Refrigerator Units: This is a bit more involved. You’ll often need to circulate the cleaning solution through the water line. Refer to your manual for the specific procedure, which may involve a “Clean” or “Service” mode.
- Rinse Thoroughly: This is the most important step! After you’re done with the cleaning solution, you need to rinse it all out to avoid vinegar-tasting ice. Empty the reservoir, fill it with fresh, clean water, and run 2-3 more ice-making cycles, discarding the ice each time. Wipe down the interior with a clean, damp cloth.
Step 4: Clean the Exterior
Don’t forget the outside! Use a soft cloth with a mild cleaner or a stainless steel polish to wipe down the exterior of the machine. Pay attention to the vents, as dust can accumulate there and affect airflow and efficiency.
Step 5: Reassemble and Enjoy
Once everything is clean and dry, put all the removable parts back in place. Plug the machine in, fill it with fresh water, and let it make its first batch of clean, crystal-clear ice. The difference in taste and quality will be immediate.
How Often Should I Clean My Ice Maker?
This is a question I get all the time. The answer depends on your usage and water quality.
A good rule of thumb is to perform a deep clean every 3-6 months. However, if you have very hard water or use your machine heavily, you may need to do it more frequently, perhaps every 2 months. For a quick refresh, you can wipe down the bin and accessible parts weekly.
Troubleshooting Common Ice Maker Problems
- Cloudy Ice: This is almost always caused by dissolved minerals from hard water or trapped air. Regular descaling will help significantly. Using filtered water can also make a big difference.
- Small or Incomplete Cubes: This often points to a clog in the water line or a dirty water filter. Mineral buildup is the usual suspect. A thorough cleaning cycle should solve it.
- Ice Tastes Bad: This is a direct sign that it’s time to clean. The cause is likely bacteria, mold, or absorbed odors. A full clean and sanitize cycle is in order.
Comparing Ice Types: Does Cleaning Affect Them?
The type of ice your machine makes—nugget, gourmet, crescent—doesn’t change the need for cleaning, but the effects of a dirty machine can be more obvious on certain types.
| Ice Type | How a Dirty Machine Affects It |
|---|---|
| Nugget Ice (Chewable) | Made from flaked ice compressed together. Mineral buildup can cause the compressor to work harder and the flakes to not bind properly, resulting in mushy, wet nuggets. |
| Gourmet/Top Hat Ice | Known for being crystal clear. Mineral deposits will make these cubes cloudy and can leave gritty sediment in your drink. |
| Crescent/Half-Moon Ice | The common shape from refrigerator units. Scale can build up on the evaporator plate, causing the cubes to be small, thin, or not release properly from the mold. |
Ultimately, no matter the shape, clean water and a clean machine are the secret ingredients to perfect ice.
Frequently Asked Questions (FAQ)
Q: Can I use bleach to clean my ice maker?
A: Yes, but with extreme caution. A solution of one teaspoon of bleach to one gallon of water can be used to sanitize after cleaning. You MUST run several rinse cycles with fresh water afterward to remove all traces of bleach, as ingesting it is harmful. Vinegar is a much safer first choice.
Q: Why does my ice still taste bad after cleaning?
A: If you’ve done a thorough cleaning and the taste persists, check two things. First, your water source. Try using bottled or filtered water to see if that’s the issue. Second, you may need to replace the water filter in your refrigerator or undercounter unit.
Q: What is the white stuff in my ice bin?
A: That white, flaky residue is almost certainly calcium carbonate—the main component of limescale from hard water. It’s a clear signal that you are overdue for a descaling.
Q: Is it safe to use a commercial ice maker descaler in my portable machine?
A: Generally, yes, but look for one that is labeled “nickel-safe.” Many ice maker components are nickel-plated, and harsh acid cleaners can damage them. Most solutions designed for coffee makers are also safe for ice makers.
Q: My ice maker has a self-cleaning function. Is that enough?
A: A self-cleaning cycle is a fantastic feature that circulates water and cleaner through the system. However, it’s not a substitute for manual cleaning. It won’t scrub away stubborn buildup in the bin or on the auger. Think of it as a great maintenance step between deep cleans.
Final Thoughts
Mastering how to clean ice maker properly is one of the most effective things you can do to ensure you always have a supply of fresh, clean, and delicious ice. It might seem like a chore, but setting aside an hour every few months will extend the life of your machine, improve its performance, and elevate every single drink you make. So, go ahead and give your hardworking ice maker the TLC it deserves. Your taste buds will thank you.